Top tips for Windows 7, Vista, XP, 2000...Free


Many imagine that this post will be a stylish collection of tricks that have been written in Click Tech, considered "the best", but really good is not the intention of this entry, but rather talk about the implementation WinTricks.

WinTricks is a program that plays no role, only to have a large database that compiles hundreds of tuco for different versions of Windows, programs as well as specific aspects of computers, among others. When I say I do not mean software application software application independent but inside the Windows operating system.

Top tips for Windows 7, Vista, XP, 2000...Free


WinTricks has tricks to the Windows registry, in addition to Internet Explorer web browser, security, Internet and hardware tricks Similarly, web sites, Microsoft Office, Windows desktop, etc.

As for the tricks that has the Windows system are for the following versions: 7, Vista, XP, 2003, 2000, 98, 95, NT 4.0, Server 2008.
WinTricks ->>


RT Se7en Lite, a free utility for Windows 7


A group of enthusiasts presented to the court the general public an interesting tool for optimizing system settings in Windows 7. Utility called RT Se7en Lite is distributed free of charge and allows you to make a great setting Windows 7 'for themselves, but also helps to reduce the space occupied by the operating system on the disk.

With utility RT Se7en Lite you can easily add your own wallpaper, icons and themes embedded in the system updates, drivers, language packs and applications. In addition, the utility lets you remove unnecessary components from the system, to enable or disable certain features, set the parameters of a fully automatic operating system installation on a new car, and offers tools to quickly create a bootable USB-drives, and images in ISO format for recording onto an optical disc.

RT Se7en Lite, a free utility for Windows 7


Perhaps the most interesting tool in the utility RT Se7en Lite is a feature to embed the necessary updates, patches, drivers and language packs to install image of Windows 7. Function of removing unnecessary components can rid your computer of unnecessary drivers, services, applications, language packs, which are installed by default.

Utility RT Se7en Lite helps activate hidden from the untrained users of Windows 7. With this tool you can quickly disable and configure the system services that enable or disable various settings in the registry, change the power management settings and change the display mode in the Control Panel.

For those who frequently engaged in installing Windows 7 operating system to users' computers, the utility RT Se7en Lite offers a rich toolkit for the preparation of the installation or rescue media. For example, this utility helps you to quickly prepare a disk for a completely unattended installation of Windows 7 with the substitution of the desired serial number, with the omission of a mandatory activation, automatic time zone setting and other functions.

To decorate your desktop and make it more personal kind of utility Windows 7 helps to change and add new topics to the standard list. Also, using RT Se7en Lite you can easily add widgets to the side of the screen, custom screen saver, change the pictures on the login screen, etc.

Tools for creating a bootable media with the Windows 7 operating system in the utility RT Se7en Lite helps build the ISO-image, and then burn it to the desired carrier or divide it into several parts. In addition, the user can export the finished image, change the label of an optical disc, etc. In general, utility RT Se7en Lite can be regarded as an excellent free tool for advanced configuration of Windows 7, it can be recommended to users of all skill levels. It should be noted, however, that developers provide for free use of their tools only for personal use - to apply it to earn money to buy a license. RT Se7en Lite official website ->>


How to remove junk software from your new computers with Windows 7


When we bought a new computer, either desktop or laptop, we have a large number of installed programs, in most cases, we do not have. Click tech Since we are going to explain how to eliminate the so-called junk software, also known as "crapware."

To solve this problem you can install the application PC Decrapifier, which searches such programs waste your manufacturer believes that you must have installed and give you the option to delete. This program works for Windows XP, Windows Vista and Windows 7. We recommend you be very careful when selecting the applications you want to remove, lest they inadvertently take away a program that you use regularly.

decrapifier remove junk software from your new computers


However, this application gives you the option to create a restore point, highly recommended if you are somewhat confused.

Another feature that many users want to remove and do not know how to do it, are some elements of Windows that are installed by default, such as Windows Media Center. To remove this or another program will have to go to Start, Control Panel, then to Programs and Features. Click Enable or disable Windows features (left text box), then we can remove or put what we want .

Click Enable or disable Windows features


It is also possible that something has been lost or not we want, so you have to enter in the search for programs and files in Windows 7 Start msconfig and uncheck everything that Windows no longer consider it necessary.

We recommend you also download Soluto, an indispensable tool that detects which applications are slowing down Windows startup to delay its load until we need them.

And in this article could not fail to mention CCleaner, an excellent tool that removes temporary files without a trace, also empty the trash, delete cookies, cache, temporary Internet files, web addresses, invalid registry entries, among other things.

new-features-in-ccleaner-version-3


Hope you have enjoyed these solutions, if you know any other that we have not mentioned and you consider basic, do not hesitate in naming it and explaining it in the comments section.


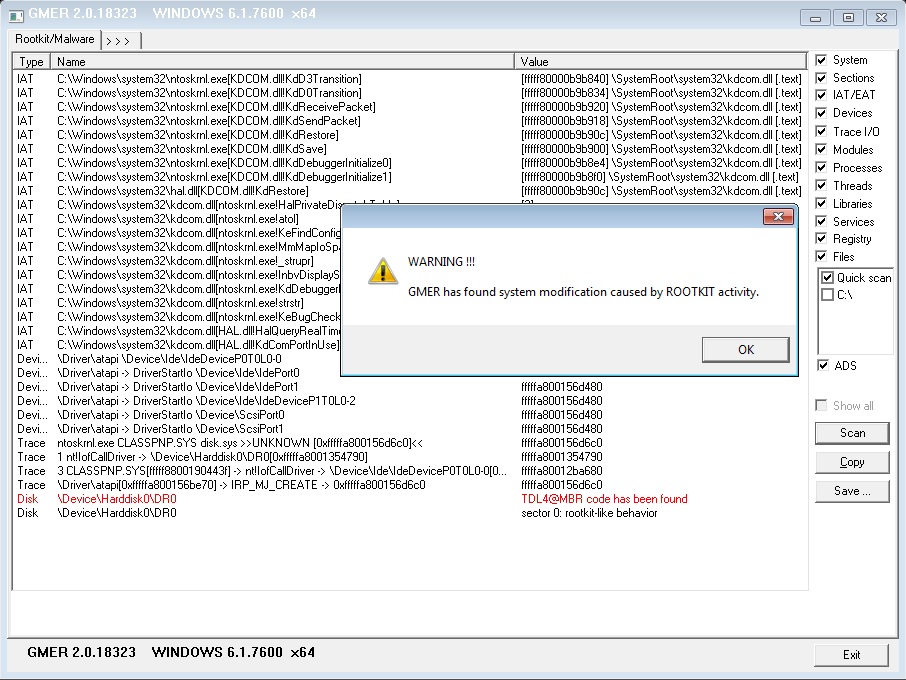
Locate and remove Rootkits and the like with GMER


Locate and remove Rootkits and the like with GMER


If you tend to download and install on your system software from unverified sources, you may come across one of those keyloggers or rootkits. Keylogging is the mechanism that can record any key is typed while working with your PC. Similarly, the rootkit is able to steal valuable information from your system to be able to have remote access to that data. To protect against these dangers is a recommended tool to block these threats. There are software as SpyShelter are able to run a scan for rootkits, keyloggers and malwares, but today we talk about another software called GMER. This application is not comparable to SpyShelter in terms of functionality, but offers a good basic protection against rootkits / malwares.

After launching the application will be immediately tested for the main memory and to follow all the devices that could be infected by rootkits. Once the primary scan, you can enable a more complete check in depth all the other areas of memory, threads, Libraries, Services, Registry, Files, and so on.
Beyond that, you can also include in this control external devices connected devices and mass storage. Just click on the Scan button to start scanning.

At the top, between the tabs, you can see those on business processes, modules, services running, Files, Autostart operating system. The Registry tab, allows access to the Windows registry directly from the main interface.
The report generated after running the scans can be saved to the log format using the Save button on the main window.
GMER is a portable which only offers basic protection. Runs on Windows, version 7 in 2000 and is available at gmer address.


How to move applications to other units of the master disk in Windows 7


It's a little hard disk space very major You, what is usually called C:? Or you has a fast SSD is too small to store all your favorite games or software?

If your primary hard drive has little space also to accommodate all the software we need every day, there is a powerful tool useful to resolve this matter, what is important is that you have available storage devices.

How to move applications to other units of the master disk in Windows 7

If the drive containing Windows was free space small, we can move all programs installed on another drive to free up valuable space. Because Windows not, at least easier, to move installed applications, will use the tool: Steam driven

This program allows you to remove other software, such as photoshop, and from the unit. Useful if after You install many programs on the drive, we realize that we need to free space rather than remove and reinstall everything, moved to another drive storage.

How to move applications to other units of the master disk in Windows

The program works well on both Windows 7 and Vista. Does not work for XP.

And SSO requires that the disk NTFS formatted. Even that will not work with FAT32 format. The practice also check the item is to open a command prompt and see the king in real time which items to move.

Here are the steps:
1. Run Steam Mover has the right administrator (right mouse button the instrument and select Run as administrator);

2. This program consists of two columns: Select form on the left of the folder source contains a list of software, not to move in the right shape "folder options "that are in another partition drive for NTFS detected on your PC;

3. Now from the list of software You simply choose the program you want move: click on the arrow to the center (white for blue background) to the right, and very fast application which will be selected in other units, hope we can always bring an application to the original by clicking the arrow to the left.

4. We're done.


Clearly, the application will work perfectly as usual and you will also save space precious storage in your main unit, which should remain mild and defragmented for provide operating system boot faster and efficient.


Adding files, folders and other items on the taskbar (system tray) Windows 7


One of the best features built in This latest Microsoft operating systems course taskbar also called applications. As our bar all know about it you can add the program executable file (with extension. Exe).

By default you can not add files, folders, or basket Windows. In this article we can make the addition using a very good function Windows 7 Taskbar Utility Products Pinner.

This is a free tool that was developed by allowing small door2windows additions with one click from each file any extensions, folders, web pages at Seven taskbar.

Adding files, folders and other items on the taskbar (system tray) Windows 7

Let's see how the first thing use. The that must be done is of course Pinner download Windows 7 Taskbar Products (available in both portable and installed) and starts (recommended with administrator
privileges).

INSTRUCTIONS 1 - add a file or folder
- Click the button next to the driveway and select whether you want to add files or folders to the taskbar.
- Use the icons next to items you can set a custom icon (must have a format. ICO).

Next, click on add item.


INSTRUCTIONS 2 - Adding a web page
- Enter the full path of the web pages (or typed the URL by selecting the page saved in HTML format) and click button next to the driveway.
- Use the icons next to items you can set a custom icon (must have a format. ICO).

Now, finally, click Add Item.


SOME NOTES (apply for a guide)
- Whether to add files and folders and add web pages can also change the existing icon by typing number on the small box beside the item icon.
- If you want to remove this from the taskbar added through special software just click right button to delete the item and proceed with removal.


CONCLUSION
Windows 7 Taskbar Items in Pinner interface which also allows for add pre-defined folders on boxes. In simply by clicking on the right side of course this list of links that already exist on taskbar is also open.

Overall this is a great program for extend the functionality of Windows 7 taskbar although I have written two other posts that describe the various tricks and extensions graph of the function at the top.


Creating a custom image of Windows 7 by RT Lite Seven


Creating a custom image of Windows 7 by RT Lite Seven

Seven RT Lite is software to build custom image of Windows 7 from A to Z. Delete features that are not necessary, configure interface, configure the registry and many again.
This tutorial is for experienced users used to format, partition, install operating system ... My sure your actions and create a backup before the changes.

Prerequisite
First download and install the RT Lite Seven on your PC. Available in 32 (x86) and 64-bit (X64). This software is in French.
RT Lite Seven (9.5 MiB, 69 downloads)

Note the availability of beta version for integration service packs.


Making pictures Your custom Windows 7

On the menu this video:
  1. Extraction Windows 7;

  2. What would you change about Windows 7?;

  3. Integration updates, language packs, applications and drivers;

  4. The selection of features to remove the system;

  5. Set in front of Windows: Office, explorer, control panel, the service ...

  6. To accelerate the installation configuration;

  7. System Customization: wallpaper, screensavers, personal documents to incorporate, display Logon ...

  8. Personal image development;

  9. Creating the Image DVD, USB, ISO ....


During the elimination of unnecessary features, which red to remain on guard for ensure system stability.


During the construction of a picture, you can choose between the frame and only Wake Rebuild All Pictures: Buildings only chose this picture so that only maintain a version of Windows (Beginers, Premium ...) that you changed. It will also help you significantly reduce weight of your final image. If you want save all versions of Windows 7, click Rebuild all of the images.


Attractive alternative for vLite for Windows 7 compatible (vLite was developed at the base for Vista). Seven RT Lite is also available to users Windows Server 2008 R2.


Change the DNS server in XP, Vista and Windows 7


Here is a freeware program that would Your lot is a tool that can loking for. Change the DNS server in XP, Vista and Windows 7 in a few clicks you make us prevent automated manual server in the LAN network configuration or network which we are connected to the Internet.

Change the DNS server in XP, Vista and Windows 7, public dns server tool


Public DNS Server Tool is the name of this application very easy to use and useful for you. With much faster can choose a public server Control that you want to use, choose from:
- Public control Google
- Norton's control;
- OpenDNS;
- OpenDNS FamilyShield;
- Comfortable Safe;
- ScrubIT control;
- DNS Advantage.


Utilization
First we proceed with the download this tool by clicking this link. Then if You are using Vista or Windows 7 you must run the tool with administrator privileges, if you're using XP should open usual.

Once opened, simply select your network card (or device) with which you are connected to Internet, select the menu for use the DNS server and click the button changed.

After this try to open website to check that everything goes correctly. If there are more pages to load so it is better to restart browser and if it still does not work restart Windows.


Manual input (for experts)
If you want you can also manually adjust the DNS server from the Community DNS Server Tool by selecting the first card network or device used for Internet and then use the box Current server DNS DNS servers separated by commas various IP inserted.


Note that:
Arrangements and changes only activated on network card or device is selected. If You have more cards then you need one. The things you can configure your do on the internet (even if you download / upload any) remains change including speed.


I changed the settings, first as a return?
If perhaps you are not satisfied with the DNS server recently applied to return to the "real" only into the properties of the connection (LAN or network
You) from the control panel, go to the Internet Protocol (TCP / IP)>> Properties and click Obtain DNS server address automatically. (Tested on XP and Vista but similar in Winows 7).


Conclusions, recommendations and alternative
program

I personally recommend you to use the public servers from Google if you want to speed up the network, OpenDNS FamilyShield if maybe you have children and want to protect by porn site and Other places of melevolent. The DNS used to try but I assure You all worked and has characteristics different.


** For the new version of the Public Server DNS Tools placements are not mutually exclusive of other DNS servers.


How to change name computer in Windows 7


A PC with Windows 7 is marked with a name, change the computer name because it is very easy.
Reasons why you may want to change can name a lot, this scenario is what happens when we buy a computer has been installed with Windows 7. Often the names given by the manufacturer only character sets.

To change the name of a PC installed with Windows 7 must take steps simple:

-Click Start, then click with the computer appropriate.
-Click Properties.

How to change name computer in Windows 7_1

-You get a window with system information.
Click Advanced System Settings on the left.

How to change name computer in Windows 7_1

-You will now see the System window Properties.
Access to the Computer Name tab.

How to change name computer in Windows 7_2

-Tab you will see the name of the computer.
To change the name to click on the Change button and type the new name.

How to change name computer in Windows 7_3


After confirming the new name will be required to restart your computer.


Back up Gadget Desktop for Windows 7


I think you all know the use of gadgets for Windows 7 desktop.
Today I will explain what to made to resolve your gadgets, so you can reinstall it quickly if necessary.

-Click Start, and type C: Users < username> AppDataLocalMicrosoft in the search field and press Enter. < username> will be replaced with the username You.
-Opening the roads specified in Windows Sidebar is a folder saving gadgets installed.


To back up only to make a copy of this folder.
Back up Gadget Desktop for Windows 7

You can also copy the folder on your computer Another gadget to transfer.


Updated DirectX 11 on Windows 7 and Windows Server 2008 R2


Microsoft has released an update for improve the performance of DirectX 11 in Windows 7 as Windows Server 2008 R2.

Customer are using the latest version of the client Windows can be obtained increasing graphics performance of the operating system platform.

"This update is a separate package of changes that must be installed in addition to Windows 7 or Windows Server 2008 R2.
This update provides new functionality and improved performance for graphics platform, "
he Microsoft explains.

In addition to being available via Microsoft Update, This update is also available via the Download
Center.

Update for Windows 7 (KB2028560)
DOWNLOAD


Update for Windows 7-based systems x64 (KB2028560)
DOWNLOAD


How to use widgets to enhance your MAC on Windows desktop


Claim: HNRV9XBMAF26
How to use widgets to enhance your MAC on Windows desktop

We continue with our roundup article intended for the resources to graphic Windows that enables us to achieve change and modification system simple operations, free of charge and without cause damage.

After seeing how the graphics change Windows 7 and Windows Vista on MAC to display a bar, a dock, folder, and in general all the look and feel styles Snow Leopard-Windows, now I'm talking about the same arguments graphics or widgets.

In practice, without too much change the sentence, we will see how use widgets to enhance your MAC on the Windows desktop with use them as if we using a computer with an apple in a written above.
This program will allow us to makes everything Kludget, open source and cross-platform (available for Windows and Linux).

This allows you to use Mac OS widgets directly on Windows, so You can decorate your desktop, such as which you think is best.

Using Kludget
- Download the official from http://kludgets.com/download/
- Install on Windows (XP - Vista - 7). You will see that it will create Kludget an icon in the system tray.


It already offers some of the default widgets like a clock, calendar (either open Kludget automatically complete the installation) and other accepted by clicking the right button on the icon to open Windows freeware items package.

As you all know, every widget on desktop can be configured with settings themselves, move out and dragged to the desktop and closed.
Special features and offers Kludget is better compatibility with widget download from Apple.

If you reach the official site where the "Apple" offer downloads of its widgets, once selected people who want to use Windows, simply download them (they are enter zip) and open it with Kludget.

Yes, but how?
For example, you download a widget Search Google and want to open in Windows.

Simply click the right button on the icon opens Kludget Windows package items. Then select widget download and note that it will be applied automatically and will be seen on your desktop.


Suggestion: I recommend you copy the widget downloaded from Apple in the way described in below for a more orderly and clean and do not end up scattered and widgets on Windows.

XP user >> C: \ Program Files \ Kludget Engine \ Widget
7 user (same for Vista) >> C: \ Program Files \ Kludget Engine \ Widget


From Apple there are thousands of widgets by category, with a preview and I tried details. It dozen and works all, but I can assure you that all the work either (I can not try them all!).

Kludget really graphic resources for used if you want to use the widget Windows MAC.


Transforming graphical Windows 7 and Vista Mac OS X Snow Leopard


graphical Windows 7 and Vista Mac OS X Snow Leopard

Many people have experienced and not experienced when watching live MAC be amazed especially present. GUI know all Apple computers as well as drugs for into external and internal, they are much cost and not suitable for all pockets of various user groups across the web and general in various countries.

Sure would be something more to holding one of which was printed on a PC logo "apple", but for many (including me) for now, and maybe in the future, still wanting.
Besides displayed in various tissues hundreds of blogs and forums that explains how install Mac OS X Snow Leopard on PC standard, creating a so called Hackintosh computer, there are also real transformation pack allows you to mimic computer Steve Jobs graphical regular PC running Windows operating system.

What we see today is probably the most suitable for all types of users because very easy to install as the file single execution.
As you can see, here on the blog rarely in topic Transformation Pack (not to be confused with the issue) because most requires technical knowledge guide minimal progress on the file system to patch and present in other Windows term.

Back to Transformation pack change as Windows 7 and Windows Vista MAC OS X Snow Leopard also enjoy the features of both OS without deleted features and functionality.

Using Help
1. Download from Snow addresses Transformation Pack; http://windowsxlive.net/snow-transformation-pack
2. extract the contents of the file;
3. This began to run with administrator privileges (Right click on the file >> run as administrator);
4. Reboot your PC rerun riavvierà.Al file execute and complete the installation.
5. Done, you must restart the computer again for the second time and last!


After restarting you will see that your Seven or Vista literally will change with adding folders, wallpaper, icons, windows, button, dock-style bar Snow Leopard.

Our goal is completed. The you may not satisfied with the results (I doubt it) to return to the country only ex-uninstall Trasformaion Snow Pack from the control panel Windows as a general application in the manner you all know.

If the goods are valued by readers(Perhaps with a comment below this post) I have also made other similar Transformation Pack is easy to install and use this as described.

Good luck . . . . !


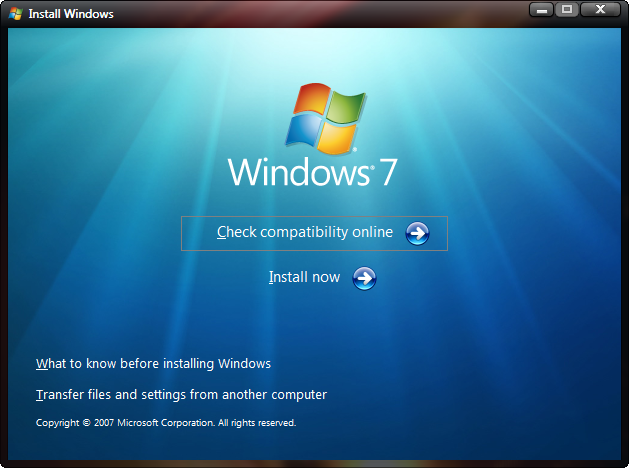
How To Burn DVD, ISO file of Windows 7


How To Burning DVD, ISO file of Windows 7

Although the title of the post seems to have a basis, I still get email users who are strunggling with the ISO file on Windows 7 and do not know how to burn a DVD. This is done usually when Windows 7 has not bought in stores and then a free download from the internet.

So once you have downloaded the ISO image of Seven and you want to put DVDs often we do not know how proceed. In This article on my experience to burn an ISO file Seven (Downloaded from Microsoft by paying license in connection with the chosen model to buy or download from the network, even better if it comes to this blog).

Before I assure you that the article, although basic, can prove very useful for users who are inexperienced a lot or they are not able to do it.


Guide
1. Download ImgBurn from the official site;http://www.imgburn.com/index.php
2. ImgBurn install on your PC;
3. open the program and select options the first to write files to a disk image;
4. Find the ISO file on your PC and select it;
5. open a new interface that will recommend whether the disk write;
6. ImgBurn will begin the process burning an image file on disk. (If notebooks multiple displays several messages error just click OK).
7. After a while the burning process to be completed so there will be nothing but continue with the 'installation;
8. to quickly check that you have mastering Windows Seven just go in resources from your PC, double click on 'Optical drive and then on the setup. exe to see the output from the installation screen.

instal Burning DVD, ISO file of Windows 7

After successful verification of your presents already ready to install the Windows 7 DVD follow the normal procedure exists. The DVD made with a perfect burn bootable boot.


Sundries article Copyright © 2010 LKart Theme is Designed by Mobile